DIY Skylights for Flat Roofs: Tips and Best Practices
Flat roof DIY skylights provide practical options for improving natural lighting and air circulation. Through thoughtful choice of placement and components, property owners can develop welcoming areas that are simultaneously practical and visually attractive. A methodical setup procedure is critical for durable outcomes. However, understanding the intricacies of insulation and maintenance is equally important. What steps should be taken to guarantee that these skylights perform efficiently over time?
Understanding the Advantages of Skylights
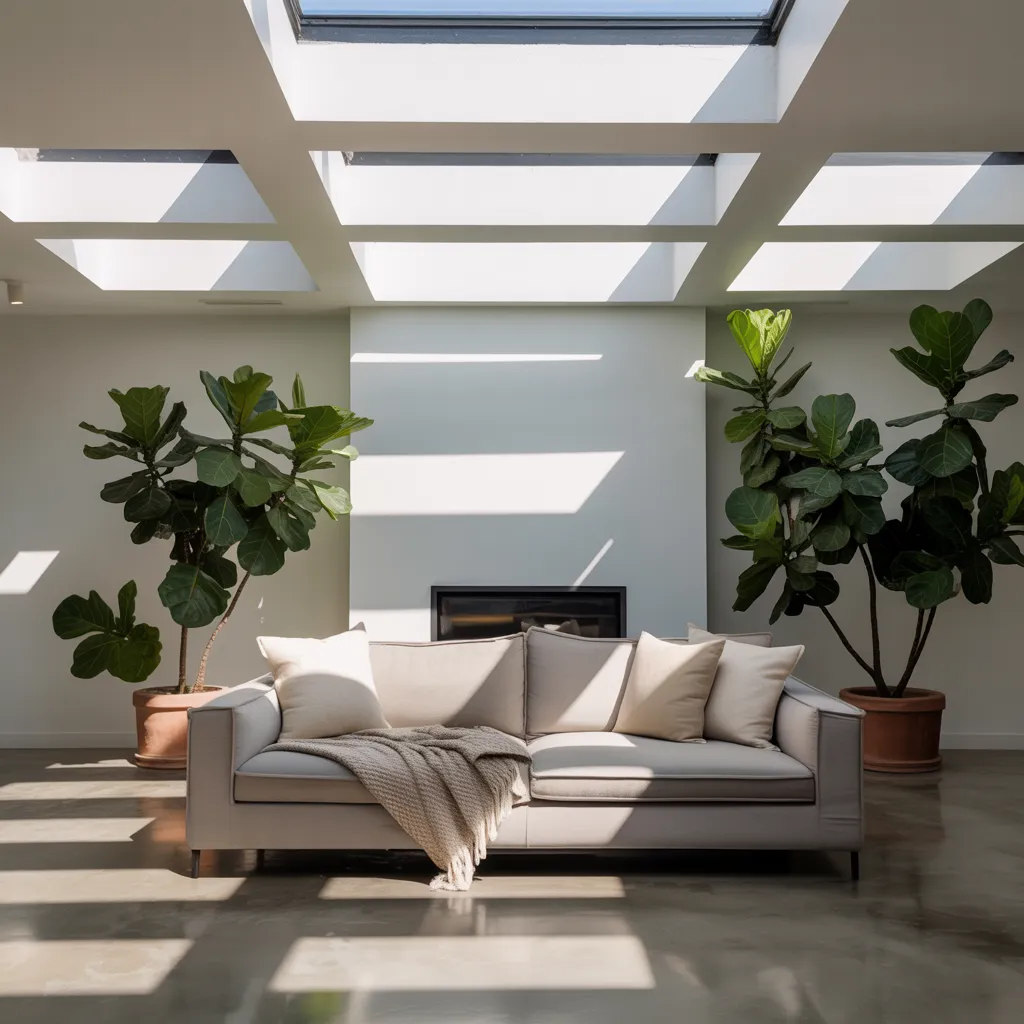
Flat roof skylights provide multiple benefits, significantly improving both visual attractiveness and practical performance. They deliver sunlight, changing gloomy, closed-in spaces into radiant and appealing zones. This addition of daylight can minimize the need for artificial illumination, creating energy efficiency benefits. In addition, skylights strengthen ventilation, supporting temperature regulation and reducing humidity indoors. They can further boost the complete value of a property by generating a more unrestricted and roomy ambiance. In addition, skylights can assist in superior air quality by stimulating airflow, which is particularly valuable in zones inclined to humidity retention. All in all, the installation of skylights on flat roofs can substantially boost a property's habitability and energy effectiveness.
Selecting the Ideal Location
When identifying the ideal placement for skylights on flat roofs, numerous considerations must be assessed to maximize their benefits. Initially, the orientation of the roof plays a critical role; south-facing skylights often capture more sunlight, increasing natural light and warmth. Moreover, proximity to adjacent structures should be analyzed, as nearby buildings or trees can obstruct sunlight and lower effectiveness. The intended use of the space below is also essential; areas requiring ample light, such as living rooms or kitchens, warrant higher skylight placement. Moreover, local climate conditions should be evaluated, as regions with heavy snowfall may need positioning that mitigates snow accumulation. Ultimately, careful planning secures maximum functionality and aesthetic appeal for the skylight installation.
Choosing Materials for Your Skylight
In selecting materials for a skylight, the decision between glass and acrylic substantially influences light transmission and durability. Furthermore, the frame material serves a crucial function in maintaining structural strength, while effective insulation and weatherproofing are essential for energy efficiency and protection against the elements. Thoughtful evaluation of these elements will ensure a successful skylight installation.
Glass vs. Acrylic Options
Choosing the right material for a skylight can significantly impact both aesthetics and functionality. Glass and acrylic are the two most widely-used options. Glass skylights provide superior durability and scratch resistance, making them ideal for long-term use. They also provide excellent clarity, enhancing natural light transmission. However, glass can be heavier and more pricey, which may make more difficult installation.
On the other hand, acrylic skylights are light in weight and typically more affordable, making them less complicated to work with for DIY projects. They are obtainable in numerous tints and can deliver UV protection. That said, acrylic is more subject to scratching and may fade over time. Ultimately, the selection between glass and acrylic will depend on available funds, desired aesthetics, and specific project needs.
Frame Material Selections
The material used for a skylight frame is vital to its structural integrity, energy efficiency, and overall appearance. Popular options feature wood, aluminum, and vinyl, each offering distinct advantages. Wood provides natural insulation and aesthetic appeal but requires regular maintenance to prevent rot. Aluminum is lightweight and durable, making it ideal for modern designs, though it may conduct heat more readily. Vinyl, a low-maintenance alternative, resists corrosion and offers good insulation, although its color options can be limited. When selecting frame materials, factors such as local climate conditions, budget, and desired aesthetics should be taken into account. In the end, the right choice will enhance the skylight's performance and complement the building's architectural style.
Weather Protection and Thermal Insulation
Quality insulation and weatherproofing are vital for maintaining the longevity and energy efficiency of skylights. When picking materials, options such as double-glazed glass or polycarbonate panels should be considered for their superior insulation properties. These materials aid in reducing heat loss in winter and limit heat gain during summer. Furthermore, proper sealing around the skylight frame is essential; using top-grade weatherproof caulk can stop water intrusion and air leaks. Insulation foam can also be applied around the similar information frame to enhance thermal performance. It is important to choose materials that are not only long-lasting but also resistant to UV degradation to maintain effectiveness over time. By focusing on insulation and weatherproofing, homeowners can establish a comfortable living space while maximizing energy savings.
Tools and Equipment Needed
To successfully install skylights on flat roofs, particular tools and equipment are necessary. This includes basic hand tools, correct safety equipment, and particular materials needed for the installation procedure. Knowing these elements will ensure a more streamlined and secure DIY experience.
Key Hand Tools
Installing DIY skylights on flat roofs successfully demands a selection of essential hand tools that provide precision and efficiency. Key tools include a tape measure, which verifies accurate dimensions, and a chalk line for marking straight lines. A utility knife is essential for cutting roofing materials, while a level confirms that skylights are installed evenly. A pry bar helps with removing existing roofing materials, and a hammer is vital for securing components. Additionally, a drill with appropriate bits facilitates easy installation of screws. A roofing square is useful for creating precise angles, and safety goggles are critical to protect the eyes during work. Together, these tools form the foundation for a successful skylight installation project.
Safety Gear Required
Safety equipment functions as a critical protective barrier during the installation of DIY skylights on flat roofs. A hard hat shields the head from potential falling debris, while safety goggles guard the eyes from dust and sharp materials. Non-slip work boots offer stability on the roof surface, reducing the risk of slips and falls. Gloves are essential for hand protection against cuts and abrasions, providing a secure grip on tools and materials. Additionally, a safety harness may be needed to prevent falls, particularly when working near roof edges. Ear protection is also advisable if power tools are used, as they can produce harmful noise levels. Emphasizing safety gear significantly enhances a secure and efficient installation process.
Required Materials for Installation
Having established the importance of safety gear, the next step involves gathering the appropriate materials and tools for the installation of DIY skylights on flat roofs. Essential tools include a circular saw for slicing through the roofing material, a measuring tape for accurate dimensions, and a level to ensure proper alignment. Additionally, a utility knife is essential for trimming excess material, while a drill enables the installation of screws or anchors.
Necessary materials comprise of the skylight unit itself, flashing kits, and sealant to avoid water intrusion. Roofing membranes with waterproof properties must also be added to boost durability. Finally, having a stable ladder will offer secure access to the roof for installation. These tools and materials are crucial for a skylight installation that succeeds.

Detailed Step-by-Step Installation Process
Setting up a DIY skylight on a flat roof can revolutionize a space by boosting natural light and enhancing ventilation. The installation process begins with selecting the suitable location, guaranteeing it is free from obstructions. Next, the area is marked, and a cut is made in the roof material, taking care to follow the skylight manufacturer's specifications. The skylight frame is then fastened to the roof deck using screws, guaranteeing a tight fit. Flashing is placed around the skylight to prevent water infiltration, followed by sealing with roofing adhesive. Finally, the interior trim is installed to finish the aesthetic look. Careful attention to each step assures a successful skylight installation, maximizing both functionality and visual appeal.
Insulation and Weather Protection Methods
When adding a skylight to a flat roof to boost natural light and airflow, adequate insulation and weather protection are crucial to ensure the structure remains energy-efficient and protected from the elements. The initial phase involves choosing high-quality insulation materials that can efficiently reduce heat transfer, such as spray foam or rigid foam insulation. Furthermore, ensuring that the skylight is properly sealed and flashed prevents moisture penetration, which can lead to structural damage. Using weather-resistant membranes around the skylight perimeter also enhances protection against moisture. Furthermore, incorporating thermal breaks can enhance energy efficiency by reducing heat loss. Finally, addressing weatherproofing and insulation throughout the installation process plays a crucial function in maintaining the structural soundness and functionality of the skylight over time.
Care and Maintenance for Your Skylights
Preserving skylights is essential for ensuring their longevity and ideal performance. Periodic inspections should be performed to detect any indications of damage, such as cracks or leaks. Cleaning the glass surface is essential, as debris and dirt can block light and lead to moisture buildup. A mild soap solution and soft cloth are recommended for this task. Additionally, inspecting the seals and flashing around the skylight can prevent water infiltration. Any worn materials should be replaced quickly. It is also recommended to clear gutters and drainage systems to maintain proper water flow. In summary, a proactive maintenance routine will boost the functionality of skylights and extend their lifespan, resulting in a brighter and more energy-efficient living space.
Your Questions Answered
Are Skylights Able to Increase My Home's Energy Efficiency?
Skylights can elevate a house's energy efficiency by permitting natural light to lessen reliance on artificial lighting. Adequate installation and energy-efficient models further optimize rewards, possibly reducing heating and cooling costs while increasing overall comfort.
What's the Average Price for DIY Skylight Installation?
A DIY skylight installation generally ranges from $200 to $1,500, determined by the size, materials, and complexity of installation. Extra costs may involve permits and potential structural modifications to the roof.
Do Building Codes Apply to Skylight Installation?
Yes, there are building codes for skylight installation, which vary by location. Such codes usually focus on structural soundness, energy efficiency, and safety standards, ensuring that skylights are installed correctly and securely within building regulations.
What Can I Do to Prevent Skylight Leaks?
To avoid leaks around a skylight, correct flashing installation is crucial. Make certain that all seams are firmly sealed with waterproof materials, and regularly inspect for deterioration or wear to sustain the integrity of the installation.
Can I Install a Skylight on a Sloped Flat Roof?
It is possible to install a skylight on a sloped flat roof. Proper drainage must be guaranteed, together with appropriate flashing and sealing practices to prevent leaks and encourage longevity. It is advisable to consult a professional for superior results.